
MapLibre GL JSとVue.js(script setup)を組み合わせた開発環境を構築してみました!
GitHubに作成した環境を公開しています。ぜひご利用ください!
maplibregljs-vue-starter
事前準備
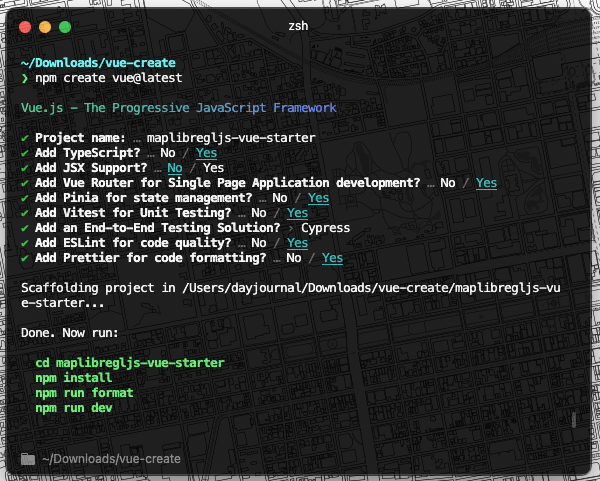
- Vue.jsのプロジェクト作成
Vue.js #006 – create-vueで環境構築

実行環境
- node v20.6.1
- npm v9.8.1
MapLibre GL JSのインストール
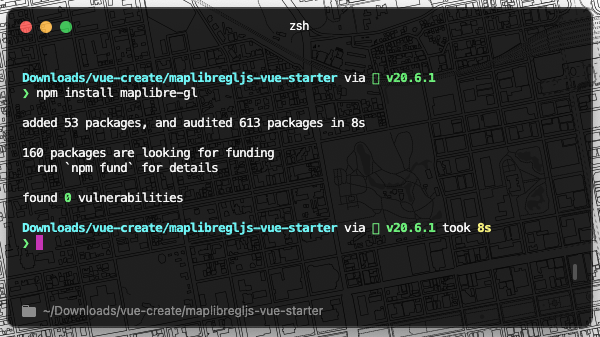
MapLibre GL JSをVue.jsのプロジェクトにインストールします。
npm install maplibre-gl
マップアプリケーションの構築
最後に、実際にマップアプリケーションを構築します。テンプレートから一部のファイル変更と削除をします。
全体構成

package.json
{
  "name": "maplibregljs-vue-starter",
  "version": "1.0.0",
  "private": true,
  "scripts": {
    "dev": "vite",
    "build": "run-p type-check \"build-only {@}\" --",
    "preview": "vite preview",
    "test:unit": "vitest",
    "test:e2e": "start-server-and-test preview http://localhost:4173 'cypress run --e2e'",
    "test:e2e:dev": "start-server-and-test 'vite dev --port 4173' http://localhost:4173 'cypress open --e2e'",
    "build-only": "vite build",
    "type-check": "vue-tsc --noEmit -p tsconfig.vitest.json --composite false",
    "lint": "eslint . --ext .vue,.js,.jsx,.cjs,.mjs,.ts,.tsx,.cts,.mts --fix --ignore-path .gitignore",
    "format": "prettier --write src/"
  },
  "keywords": [],
  "author": "MapLibre User Group Japan",
  "license": "ISC",
  "dependencies": {
    "maplibre-gl": "^3.3.1",
    "pinia": "^2.1.6",
    "vue": "^3.3.4",
    "vue-router": "^4.2.4"
  },
  "devDependencies": {
    "@rushstack/eslint-patch": "^1.3.3",
    "@tsconfig/node18": "^18.2.2",
    "@types/jsdom": "^21.1.2",
    "@types/node": "^18.17.15",
    "@vitejs/plugin-vue": "^4.3.4",
    "@vue/eslint-config-prettier": "^8.0.0",
    "@vue/eslint-config-typescript": "^12.0.0",
    "@vue/test-utils": "^2.4.1",
    "@vue/tsconfig": "^0.4.0",
    "cypress": "^13.2.0",
    "eslint": "^8.49.0",
    "eslint-plugin-cypress": "^2.14.0",
    "eslint-plugin-vue": "^9.17.0",
    "jsdom": "^22.1.0",
    "npm-run-all": "^4.1.5",
    "prettier": "^3.0.3",
    "start-server-and-test": "^2.0.0",
    "typescript": "~5.1.6",
    "vite": "^4.4.9",
    "vitest": "^0.34.4",
    "vue-tsc": "^1.8.11"
  }
}
/src
App.vue
既存のページを削除しルーターのみにします。
<script setup lang="ts">
import { RouterView } from 'vue-router'
</script>

<template>
  <RouterView />
</template>

<style scoped></style>
/src/assets
main.css
App.vueの既存CSSをリセットします。
@import './base.css';

html,
body,
#app {
  color: black;
}

a,
.green {
  text-decoration: none;
  color: hsla(160, 100%, 37%, 1);
  transition: 0.4s;
}

@media (hover: hover) {
  a:hover {
    background-color: hsla(160, 100%, 37%, 0.2);
  }
}
/src/router
index.ts
既存のルータを変更しHomeViewのみにします。
import { createRouter, createWebHistory } from 'vue-router'
import HomeView from '../views/HomeView.vue'

const router = createRouter({
  history: createWebHistory(import.meta.env.BASE_URL),
  routes: [
    {
      path: '/',
      name: 'home',
      component: HomeView
    }
  ]
})

export default router
/src/views
HomeView.vue
マップコンポーネントを読み込むように変更します。
<script setup lang="ts">
import MapPane from '../components/MapPane.vue'
</script>

<template>
  <main>
    <MapPane />
  </main>
</template>
/src/components
MapPane.vue
新規でMapLibre GL JSのマップコンポーネントを作成します。
<script setup lang="ts">
import 'maplibre-gl/dist/maplibre-gl.css'
import { Map, NavigationControl } from 'maplibre-gl'
import { onMounted } from 'vue'

onMounted(() => {
  const map = new Map({
    container: 'map',
    style: {
      version: 8,
      sources: {
        MIERUNEMAP: {
          type: 'raster',
          tiles: ['https://tile.mierune.co.jp/mierune_mono/{z}/{x}/{y}.png'],
          tileSize: 256,
          attribution:
            "Maptiles by <a href='http://mierune.co.jp/' target='_blank'>MIERUNE</a>, under CC BY. Data by <a href='http://osm.org/copyright' target='_blank'>OpenStreetMap</a> contributors, under ODbL."
        }
      },
      layers: [
        {
          id: 'MIERUNEMAP',
          type: 'raster',
          source: 'MIERUNEMAP',
          minzoom: 0,
          maxzoom: 18
        }
      ]
    },
    center: [139.767, 35.681],
    zoom: 11
  })

  map.addControl(
    new NavigationControl({
      visualizePitch: true
    })
  )
})
</script>

<template>
  <div id="map"></div>
</template>

<style scoped>
#map {
  height: 100vh;
}
</style>
ローカルサーバーで確認
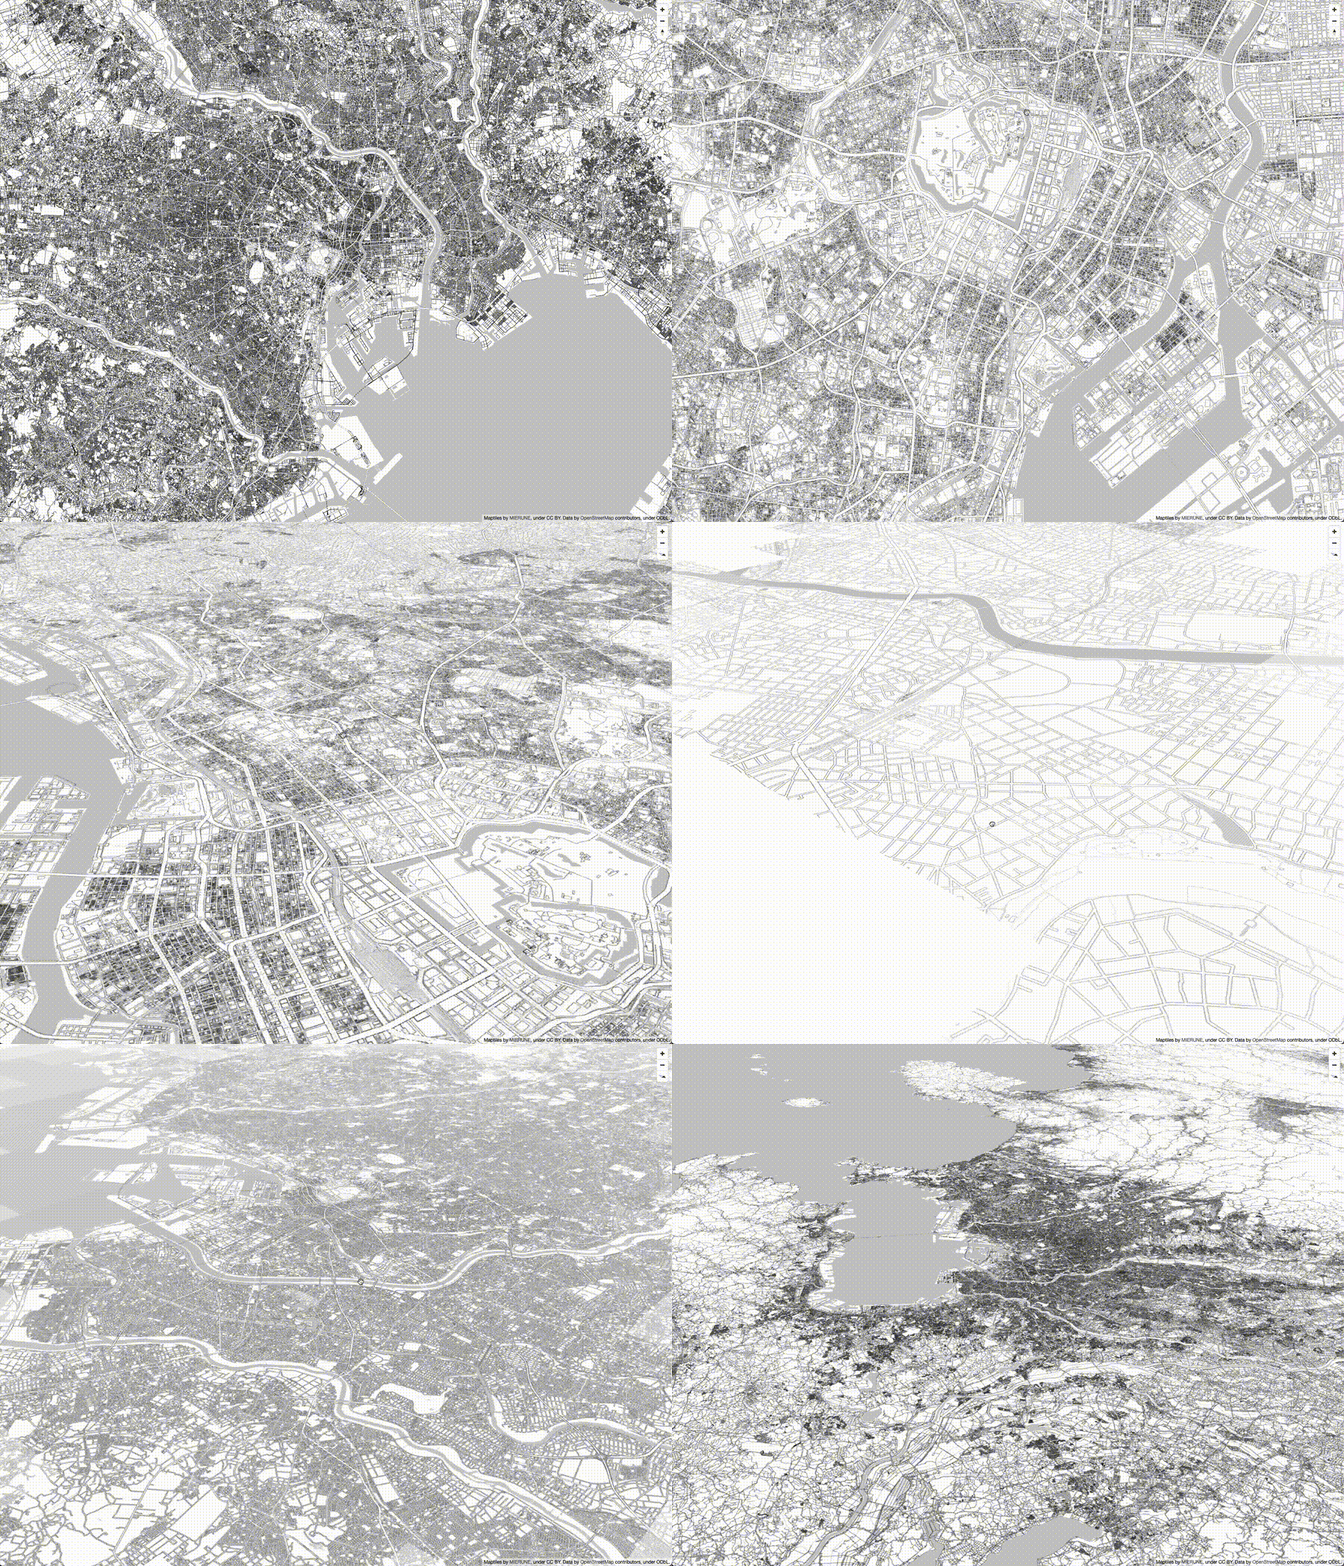
npm run serveVue.jsのscript setupとMapLibre GL JSを組み合わせて表示することができました!

MapLibre GL JS・Vue.jsについて、他にも記事を書いています。よろしければぜひ。
tags - MapLibre GL JS
tags - Vue.js
- 参考文献
MapLibre GL JS
Vue.js


